- At as bright as the full Moon is as seen from Earth, the full Earth as seen from the Moon has got it beat by almost every metric possible. The Earth is about 3.67 times the diameter of the Moon, meaning that its cross-sectional area, or how big it appears in the sky, is thirteen times as great as the Moon.
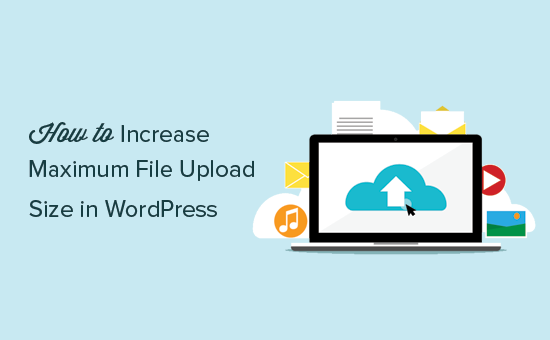
Are you looking to increase the max file upload size in WordPress?
Perhaps you’ve tried uploading images or other media content and got an error message that read something like: “file exceeds the maximum upload size for this website”? This is fairly common with WordPress websites.
Fortunately, there are a few simple ways to fix this. In this article, we’ll share 3 simple methods for increasing the max file upload size in WordPress.
Ready? Let’s jump right in!
What Is the Max File Upload Size in WordPress?
By default, the max file upload size for images in WordPress is determined by your hosting service, so it varies.
That said, the common practice is usually to set a limit anywhere between 2MB and 500MB.
The good news is, if your website’s file upload size allocation is lower than what you want, you can easily increase it.
Here’s an easy way to check your site’s max file upload size:
From the WordPress admin dashboard, click on Media » Add New. This will open up the media upload page.
Scroll down to see the Max Upload Size and the value it’s currently set to.

Knowing the precise upload file size allowed for your site will help you decide how much to increase it by.
How to Increase Max File Upload Size in WordPress
To increase the max file upload size in WordPress is to allow for larger files. These might include higher-resolution images, videos, or other media. You can increase the max file upload size in a few ways, including by using a code snippet or directly editing the functions.php file.
In This Article
- Method #1: Add a Code Snippet Using WPCode (Easy)
- Method #2: Directly Edit the functions.php File (Advanced)
- Method#3: Adjust File Upload Size for WordPress Forms
- Method #1: Add a Code Snippet Using WPCode (Easy)
The safest way to increase the max file size limit in WordPress is simply by using a plugin called WPCode.
WPCode is an awesome solution for inserting custom code into your functions.php file.
Among its many benefits, it’s extremely easy to use and includes advanced code validation that safeguards you from making coding mistakes that may accidentally break your theme or site.
To get started, download and install the plugin on your website. If you need some help with this step, here’s a quick guide to installing WordPress plugins.

After you’ve installed WPCode, head into the WordPress admin area and navigate to Snippets » Add New.

This will open the code editor window where you can insert any code.
Start by adding a title for your snippet and then paste in your code. Just make sure you select the right code type first.
Since we’re working with PHP, this will be Functions.

Here, copy and paste the code below:
@ini_set( 'upload_max_size' , '256M' );
@ini_set( 'post_max_size', '256M');
@ini_set( 'max_execution_time', '300' );
In the code above, the first line defines the max file upload size, which is 256M i.e. 256 MB, in this case.
You may notice that the second line has an identical figure. This line defines the maximum size of posts.
We’re focused on increasing the max file upload size, but the max post size is important too. Here’s why: media files will usually be used in posts. Naturally, you’ll need your posts to have enough space to accommodate your largest files.
So you’ll have to set the max post size to a value equal to or greater than the max file upload size.
Now that you know how this works, go ahead and enter the code, changing the figures to whatever values you’d like.
Once you’ve done this, check that Run snippet everywhere is ticked.

Then scroll back up and click Save Changes, and that will be it.
Method #2: Directly Edit the functions.php File (Advanced)
The functions.php file can be accessed from within the WordPress backend, making it easy to use.
If you’re comfortable working with live code, this method might be for you. However, we don’t recommend this method for beginners, as there’s a risk of causing serious errors that might break your site.
If you do decide to use this method, the best practice would be to create a backup of your website before you begin.
Once your site is safely backed up, you can find the functions.php file by navigating to Appearance » Theme File Editor.

A modal will pop up warning that you’re about to edit your website’s core files. As we mentioned, you’ll need to be careful while working with the functions.php file.
But if you’ve created a backup of your website, feel free to proceed by clicking I Understand.

Next, look for the functions.php file from the list of files on the panel on the right of your screen.

Scroll to the bottom of the page and paste in the same code as before:
@ini_set( 'upload_max_size' , '256M' );
@ini_set( 'post_max_size', '256M');
@ini_set( 'max_execution_time', '300' );
Remember that the values in the first two lines define the max file upload size and post size. In this code, the max file and post size is set to 256M, which means you can upload file sizes as large as 256 MB.
If you’d like to change the max limit to a different value, just change the numbers at the end of the first two lines of code to whatever value you’d like (remember that ‘M’ stands for MBs here).
Now, go ahead and paste this code at the bottom of the functions.php file.

Remember to save these changes before you exit.
Now that you know how to adjust the file upload limits for WordPress, did you know that you can also change the max file size limit for your WordPress forms separately?
If you have forms on your site that accept file uploads from visitors, it might be a good idea to set an appropriate file upload size limit specifically for these forms.
Method#3: Adjust File Upload Size for WordPress Forms
As mentioned, this method is all about adjusting the max file upload size just for your WordPress forms.
Thankfully, this is straightforward and doesn’t require any code whatsoever.
Here’s what to do:
Create a New Form
From the WordPress dashboard, click on WPForms » Add New.

This will open up the template library where we’ll choose the Simple Contact Form template.
Click on Use Template to open up the form builder.

This will load the Simple Contact Form form template.

Like all WPForms templates, this template can be fully customized. In the next step, we’ll add a File Upload field to this form and set a max upload size limit for it.
Add a File Upload Field to Your Form
In the form builder, you’ll see the available form fields in the panel on the left. Look for the File Upload field in the Fancy Fields section.
Drag and drop the File Upload field, placing it where you’d like to include it in your form on the right.

After adding the File Upload field, click on it to open the Field Options on the left hand panel.

Scroll down to Max File Size and enter the figure you want. Remember that you can’t set a max file upload size higher than what your WordPress site allows. However, you can set a lower size limit specifically for WPFroms if you’d like.

Changing this setting will also change the max file attachment size for file upload attachments to your form’s email notifications.

When you’re done, go ahead and Save your form.
Publish the Form on Your Site
To publish your new form, click on Save at the top right corner of the form builder.

Next, click on Embed to add your form to a page.

This will open up a modal asking if you want to publish the form on an existing page or if you want to create a new page. In this example, let’s embed the form in a new page.
Select the Create New Page button to continue.

Enter a title for your new page and press Let’s Go.

You’ll now be redirected to your WordPress page edit screen with your form already embedded in it.
This is a good chance to take a look at your page, edit or add any other elements if needed, and publish the page when you’re ready.

After the form is live, you can go ahead and check it out. Here’s what the form we built in this tutorial looks like from the frontend:

As you can see, we have a form with a file upload field that allows users to upload a file from their computer.
If a user uploads a file that is larger than the limit we defined, WPForms will refuse to upload and give an error:

On the other hand, visitors will have no problems uploading supported file types that are under the specified size limit:

That’s pretty much it! Now you know how to increase the max file upload size in WordPress!
Next, Explore the Top File Upload Plugins
We’ve just shown you one way to allow users to upload files to your WordPress website. you might be interested in learning how to do similar things using other WordPress plugins.
<a target="_blank" href="https://shareasale.com/r.cfm?b=2271950&u=3802034&m=133410&urllink=&afftrack="><img src="https://static.shareasale.com/image/133410/5.jpg" border="0" /></a>

